4 fun Mac Photos tips you’ll use

If there’s an Apple app that’s used as frequently and known as little as Photos I’d be surprised. The application Steve Jobs once called a ‘digital shoebox’ for images hides hordes of useful little features, so I thought I’d share a few of them here.
Mac: How to see before and after edits
Apple Photos application has a secret keyboard command you can use to see Before and After views of an image while you are working on it. How to use it: While inside the Edit menu on an image, press and hold the M key on your keyboard to see what the original picture looked like, the current edited version will reappear once you let go the M key.
This little tip is so helpful when editing images.
It isn’t the only Photos keyboard shortcut.
In fact, there are so many most Photos users simply can’t remember them all. You don’t need to, just open the Keyboard Shortcuts item in the Photos Help menu and then choose Keyboard Shortcuts on the help page that appears. The good news is you can then print the collection out.
Mac: How to make a GIF from a Live Photo
You’ve held your iPhone steady, taken a picture with some movement at the center of the frame and you want to turn it into a GIF. Now put your iPhone down and boot up Photos on your Mac, or send the image you want to use to your Mac another way. Add it to your library (if you are using iCloud Photo Library it should already be in there).
- Look for the image in Live Photos.
- Double-click the image and tap Edit in the top right corner, apply whatever filters or effects you need.
- Tap the arrows (just by the film roll) and choose Loop or Bounce
- Tap Done
- Now Control-click on the image to access the Share menu and send it to yourself as an email. It will automatically be converted into a GIF and sent. You can then reuse it like any other GIF
- The image will also automatically be converted into a GIF if you simple drag it to your Desktop from Photos. You can then reuse it like any other GIF.
Here’s one I made earlier.

Mac: How to make a photo book
You can create photo books using Photos on your Mac. It’s quite easy:
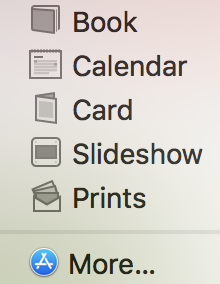
- Create an album of images you want to use in a book (or card, or slideshow, prints, or calendar) inside the Photos app. Name the album.
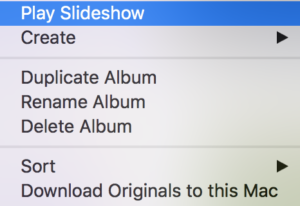
- Now Control-click the album name in the sidebar and choose Create from the drop-down menu that appears.

- Choose Book, Calendar, Card, Slideshow or Prints, as required.
- You’ll be asked to choose between a Square, Classic or Softcover book, after which you will select a book type (Travel Shots, for example).

- You can then lay the images out in the book design, add more images, and eventually pay for a nice book of images.
Mac: Use a little intelligence
Apple’s Photos app includes a little Artificial Intelligence (AI). The least you can do is use it. How do you do that? Open Photos and type “trees” to find all the images in your collection Photos thinks include trees. It will also recognize boats, cats, dogs, rivers, facial expressions (“smiling”), apricots, motorcades, boats and more. (There’s a list of these here).
You can also ask Siri to do things for you, “Find my photos from October,” for example.


