How to find your HomePod’s settings
HomePod users are often confused enough to ask, “Where are my HomePod settings?” when they try to find and change the configuration of their systems on iOS 11. This is because Apple stashed the settings they needed to find in different places. This changes in iOS 12. Here is what you need to know to find your HomePod’s settings:
How to find your HomePod’s settings?
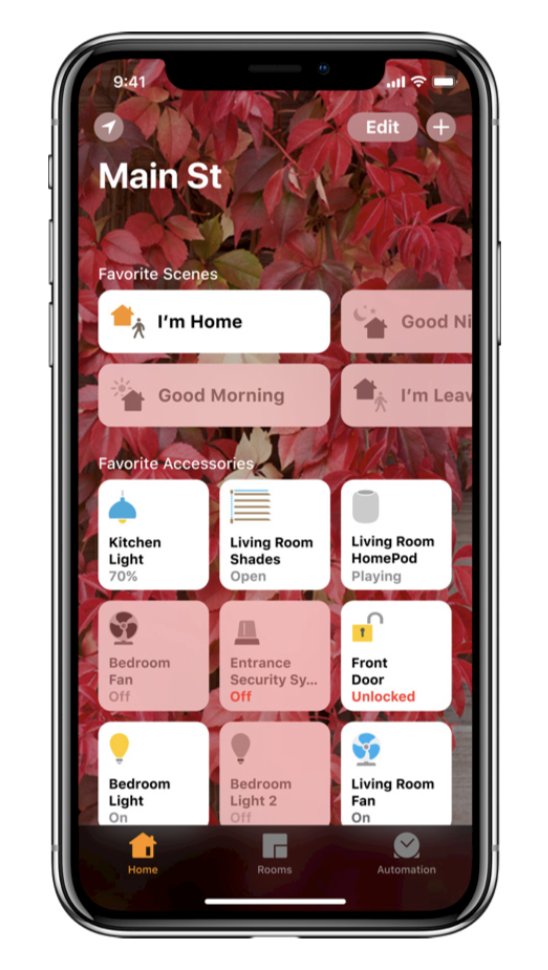
The HomePod is controlled using Apple’s Home app. The challenge is that the controls you need to use are hidden in separate places in the app in iOS 11. They include:
- To get to the first collection of Settings you should tap and hold the HomePod icon in Home and then tap Details
- To reach the second collection of Settings you should select the HomePod icon in Home and then tap the Location icon you see at top left of the app screen.
- The third collection of HomePod settings are reached when you tap your name in the second screen.
What do I use the first collection of settings for?
The first set of HomePod controls let you name your system, control your accounts and enable such options as allowing explicit content or using your Listening history for music recommendations. You can also set Siri, Location, Accessiblity and Analytics settings here, and check your product serial number.
This is the place to go to:
Do things like changing Siri’s voice, to enable or disable Hey Siri, or to disable Listening History if you don’t want kids or visitors messing up your Siri-based music recommendations.
What do I use the secondary collection of settings for?
The second collection of settings is also important – so it’s a shame they are so hidden from view. With the HomePod icon selected in Home (so it shows in white) and then tap the Location icon you see at top left of the app screen. A new pop-up may appear at the bottom of the screen, if it does not you will be in the Home Settings of your app, where you can make a variety of changes to your HomePod. These include Software Update, sharing accessory controls, enabling use of HomePod by everybody and access to even more settings.
This is the place to go to:
Bring your software up-to-date, or to set automatic updates. It is also where to go to access the third set of controls, which you really need to use from time-to-time.
What do I use the third collection of settings for?
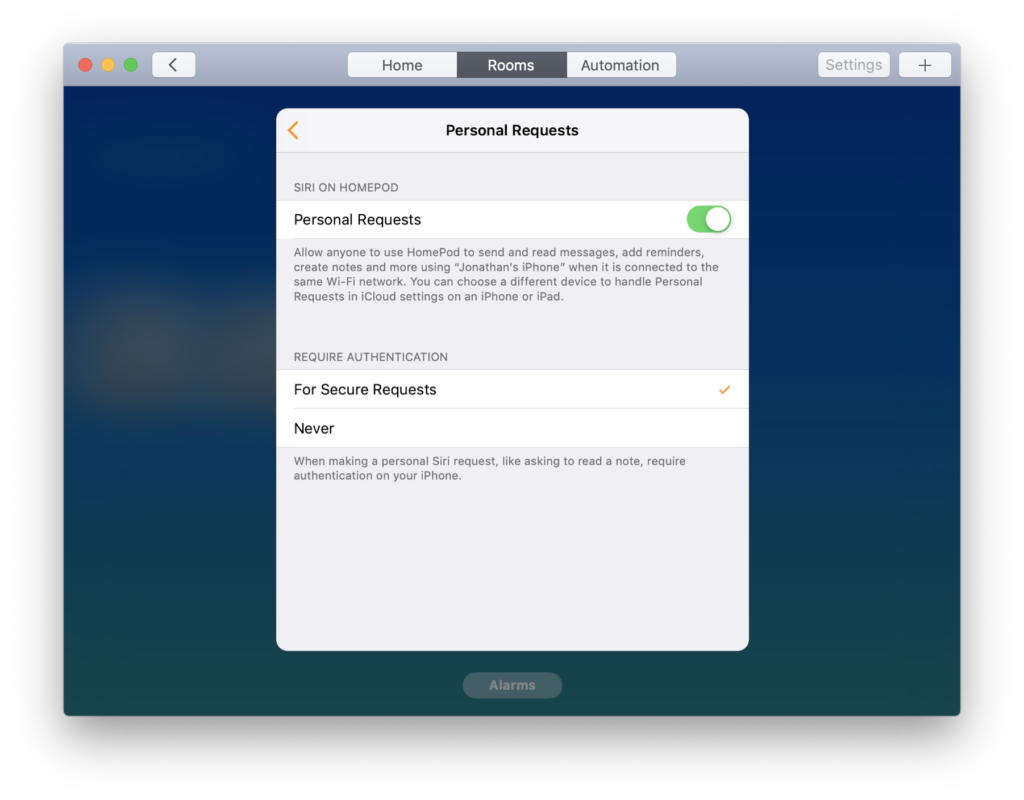
I’d argue that one of the most important HomePod settings to master is also one of the hardest to find: Personal Requests. You can also set an additional level of authentication on your HomePod so that if anyone wants to create a Note or send a Message they will be asked for an authorization code, which is delivered to your iPhone. This means that in order to take control of your HomePod security you must tap the location icon on the generic Home screen, then tap your name in the next display and only then can you access these important settings.
This is the place to go to:
Disable or restrict access to the personal request features inside of your HomePod system.
[amazon_link asins=’B00V9Z2VXE’ template=’ProductCarousel’ store=’9to5ma-20′ marketplace=’US’ link_id=’1071e4ef-b50a-11e8-9a9e-8b65c62f97eb’]
How do I control HomePod settings in iOS 12?
This changes in iOS 12. Apple has combined many of the settings it had spread across three different places in Home in iOS 12. This means you can get to almost all the settings you might want to change by tapping and holding the HomePod icon in Home and then tapping Settings (which replaces Details). You will still need to press the top left icon on the Home screen with HomePod selected to access controls for personal requests and Software Update, but this is a big improvement.
You can also control HomePod from a Mac
macOS 10.14 Mojave introduces a macOS version of the Home app and you can also use this to control HomePod settings from your Mac. It’s a lot easier as all the settings are in one place, which you can access with a double-tap on the icon in Home, tapping the Settings button. This seems a much better approach overall.
