5+ ways to increase the working Desktop area on your Mac

The situation:
You are working on your MacBook and need to find some way to get just a little more Desktop space to work more effectively on your project. Perhaps you want to see more of your image, or want to compare more items in a document or book.
The solution:
Apple has packed a range of useful tools that should help you maximise Desktop space inside the Mac, including that you can hide the Menu bar, Dock, use Full Screen mode and even use an iPad as an external display.
How to hide the Menu bar
Starting with the El Capitan macOS, Apple made it possible to hide the Menu bar.
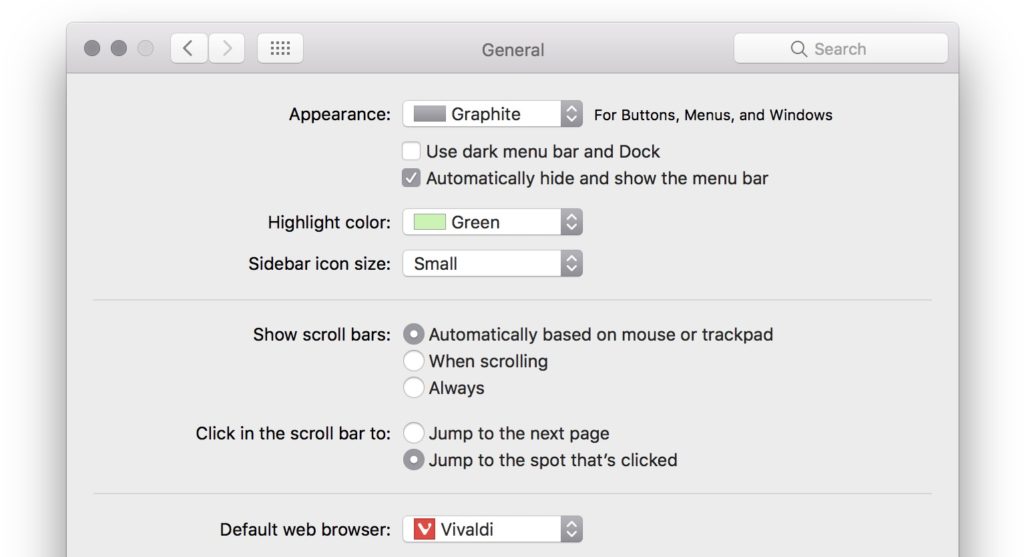
- Open System Preferences>General
- Look at the Appearance section, you’ll want to toggle the ‘Automatically hide and show the Menu bar’ setting to on.
- **boom**: Your Menu bar will immediately disappear, which gives you a little bit more usable space.
- Your Menu bar hasn’t really gone: When you need to access it just hover your cursor where it should be and it will reappear.

How to hide the Dock
I do think most Mac users know how to hide the Dock when they don’t need it, but it might be worth including here.
- Open System Preferences>Dock and toggle ‘Automatically hide and show the Dock’ to on.
You can also control-click the dividing line between applications and documents/Trash and select Turn Hiding On in the menu that appears.
How to change Display Resolution
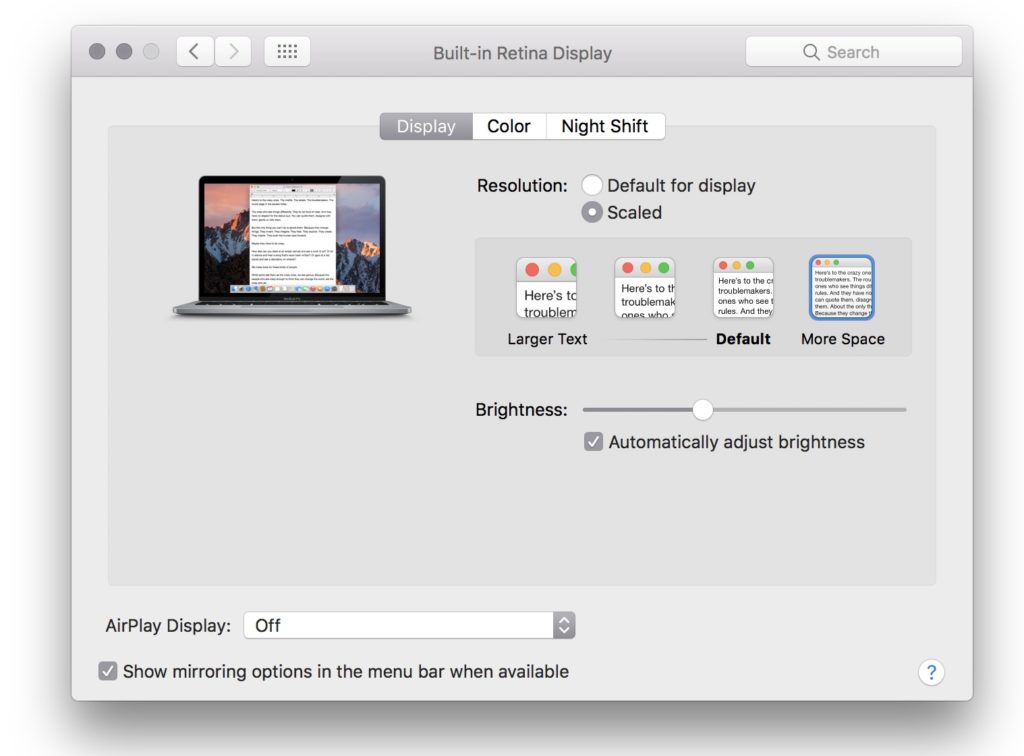
If you are using a Retina Display, Apple has hidden another neat way to get more desktop space inside Display settings (System Preferences>Displays).
- In the Displays dialog that appears you’ll probably see your Mac set to ‘Default for Display’, you’ll also see another option, ‘Scaled’.
- Enable Scaled and you’ll find four options – Larger text, an unmarked option with slightly smaller text, default (your current setting) and More Space.
- Select More Space and the display resolution will change, enabling you to see more stuff in your viewable area.
Maximize and Minimize
Another handy OS X feature is the ability to maximize your active app to full screen mode. To get to this mode just tap the green traffic light button in the window — or right click it to be given the chance to tile an app to either the left or right-hand window.

How to use Sidecar Mode
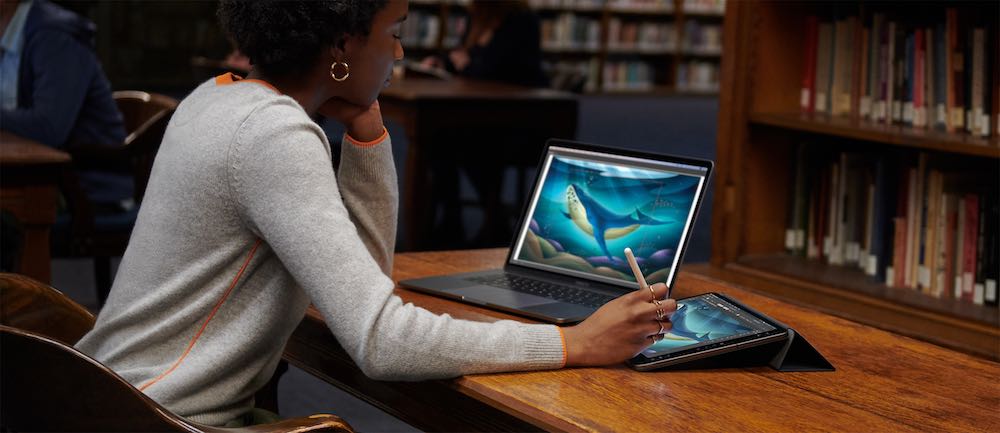
If you have an iPad and are running macOS Catalina you can set your iPad up to work as a second connected Mac monitor thanks to Sidecar mode.
- First you must be logged into the same Apple ID on both devices, and Bluetooth must be switched on.
- Second you should use the AirPlay item in the Menu bar to connect the two devices — just find the iPad you want to use, choose it and your Mac screen should be mirrored on the tablet.
- You can send an app to Sidecar on your iPad by hovering the cursor above the green button until the Move to iPad item shows.
- To stop using your iPad as a second display, just tap AirPlay and choose “Disconnect.
How to use Split Screen Mode
Now you have all this usable screen space you’ll want to make use of it. Quite apart from using Spaces, Mission Control, and handy tricks like grouping all your documents inside of their app, you also need to learn to use Split Screen Mode.
- To get to using Split screen on a Mac just hold down the green traffic light button in the top left of the app window.
- Keep holding it and you should see the window shrink and the screen should develop a line down the middle, with a greyed-out area denoting the active half of the screen.
- Just drag the app you are using now to the relevant part of the window (left or right)
- Release the button then click another app window to use both applications alongside each other. When you want to exit Split view just tap the green button.
I hope these ideas help you get a little more from using your Mac — now you should spend a little time working out how to get things done faster on your machine.
Please follow me on Twitter, or join me in the AppleHolic’s bar & grill and Apple Discussions groups on MeWe.


