How to screenshot on Mac

There are numerous ways to take screenshots on your Mac, including several seldom used options and a couple of Mac-specific choices, too. Learn all of them in this guide:
How to use the Screenshot tool in Mojave and later
Mojave’s new image capture shortcut is Command-Shift-5. When you tap you invoke a shortcut in which you can choose the type of image you want to take (including capturing video of what happens on-screen), access options for save destinations and more
- Type Command-Shift-5 now.
- In the window that appears at the bottom of the screen, tap the type of shot you wish to take.
- You’ll then see a preview appear.
- To cancel the preview, tap Options and switch off the Show Floating Thumbnail item.
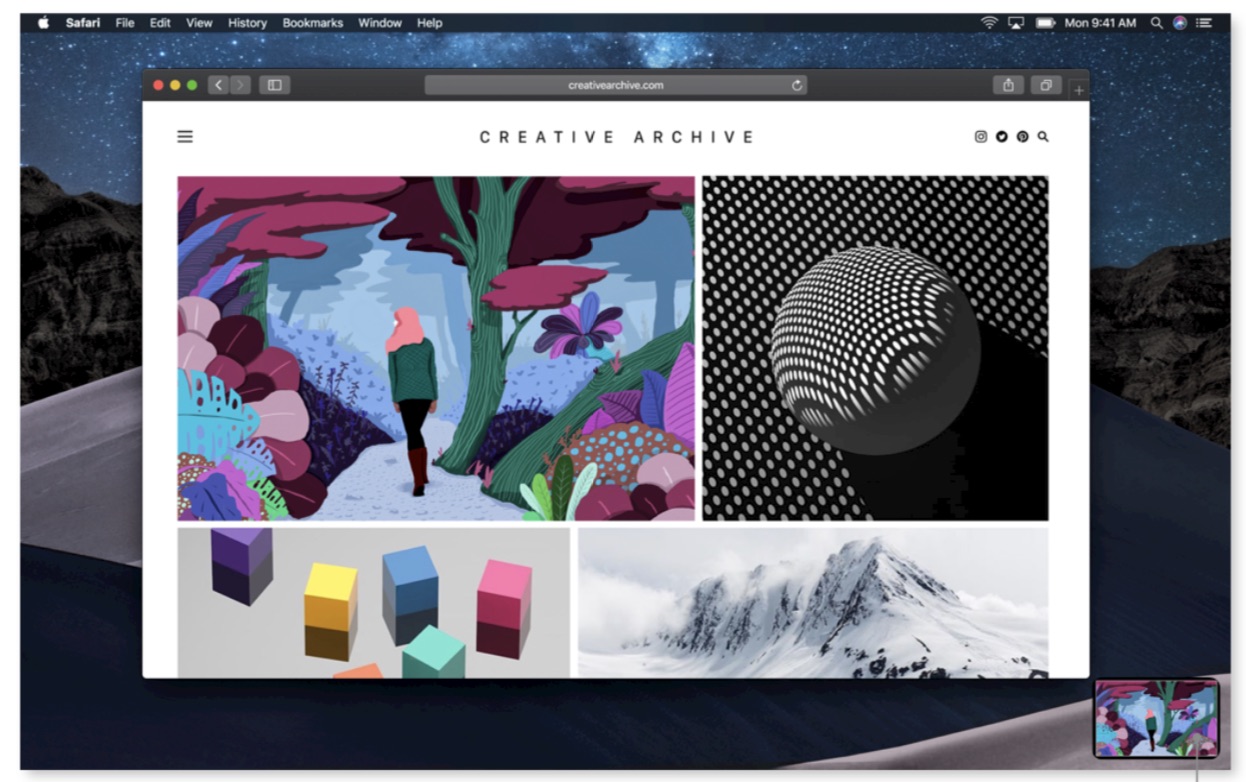
- After you take a screenshot or video, a thumbnail appears in the corner of the screen. Drag the thumbnail into a document or folder, swipe to the right to quickly save it, or click to edit or share it.
What capture tools are available in Screenshot?
There are several screenshot tools available to you in the screenshot window of Mojave and later:
- X: Closes the menu.
- A screen icon: Capture the entire screen.
- Window icon: Click this to capture a window.
- Dotted box: Capture a selection of the screen.

New in Mojave came new screen grabbing tools
- Screen icon with dot: Record video of the entire screen – it’s a feature you used to get in QuickTime.
- Dotted screen icon with a dot: Record video of a selection of the screen.
- Options: Select this to decide where you want to save your new image to (Desktop Documents, Clipboard, Mail, Messages, Preview) or to set a timer (None, 5- or 10-seconds). You can also choose to show or not show the mouse cursor in the image you capture.

How to capture the entire screen
You can capture an image of the entire screen by pressing Shift-Command-3. You’ll find the image as a png file on your Desktop.
How to capture an element of the screen
You can take a shot of a specific part of the screen. To do so tap Command + Shift + 4 and use the draggable crosshair to select the onscreen elements you need.
[Also read: A whole feed of tips available here.]
How to take a picture of a window
Press Shift-Command-4 and then tap the Space bar. You should see a camera icon on screen. To select a specific window to take an image of just use your mouse to place that icon above the window you require (it should be highlighted). When the correct window is selected just click.
How to take a picture of an app window without a shadow
The above sequence captures the app window but adds a macOS-like shadow to the image. To get rid of the shadow follow the above sequence, but press the Option key before tapping the Space bar.
Above: Here’s how Apple used to get you to use its operating systems.
Are there any more shortcuts?
There are several other screenshot capture shortcuts for Macs. Here are the most useful ones:
- Capture entire screen and save as a file: Command-Shift-3
- Capture entire screen and copy to the clipboard: Command-Ctrl-Shift-3
- Capture a dragged area: Command-Shift-3
- You can also capture a dragged area and copy the image to the clipboard, from which it can be pasted into other apps: Command-Ctrl-Shift-4
- To take an image of a window, menu, icon, or the menu bar: Command -Shift-4
How to save to Clipboard
This may save you a little time: when you capture an image if yoy press Control while using the standard command keys you will copy the image to the clipboard. Once in the Clipboard you can paste the image into other apps.
Introducing the Screenshot app
The Screenshot application is in your Utilities folder inside the Applications folder. You can use it to take number of shots, including short videos, by simply clicking the relevant icon in the selection tool that appears at the bottom of your screen when Screenshot is invoked.

How to grab the cursor
To include the cursor within a scree shot you use the Screenshot app (Command-Shift-5). In the box open Options and enable the show the Mouse pointer item.
Did you know you can use Preview to capture screenshots?
Use Preview to capture full screen images – just choose File>Take Screenshot.
Two Touch Bar screenshot tips
When using a Touch Bar Mac you have two more tricks:
- Press Shift-Command-6 to capture an image of what is on your TouchBar,
- You can also customize the Control Strip to include a screenshot button
How to cancel a screenshot
To cancel a screenshot before you capture it but after you invoke it, tap the Esc key. The operation will be cancelled.
How to Change The Default Screenshot Format
You can change the file type of images you capture using Terminal. Find out how this is done here.
How to Print Screen on Mac
In almost any window you can choose Print Screen in the file menu. Alternatively, just create a screenshot, open that and print that item.
Are you aware of any more Mac screenshot tips? Please let me known in comments below.
Please follow me on Twitter, or join me in the AppleHolic’s bar & grill and Apple Discussions groups on MeWe.


